Tuesday 22 April 2014

windows chapter 2

When we initially designed the house, we wanted steel-framed windows for the brick section, and new timber windows for the plywood section.  However by buying second-hand windows on ebay, and changing what we wanted, we were able to save $27,000 and a truckload of embodied energy.  (more on that later).

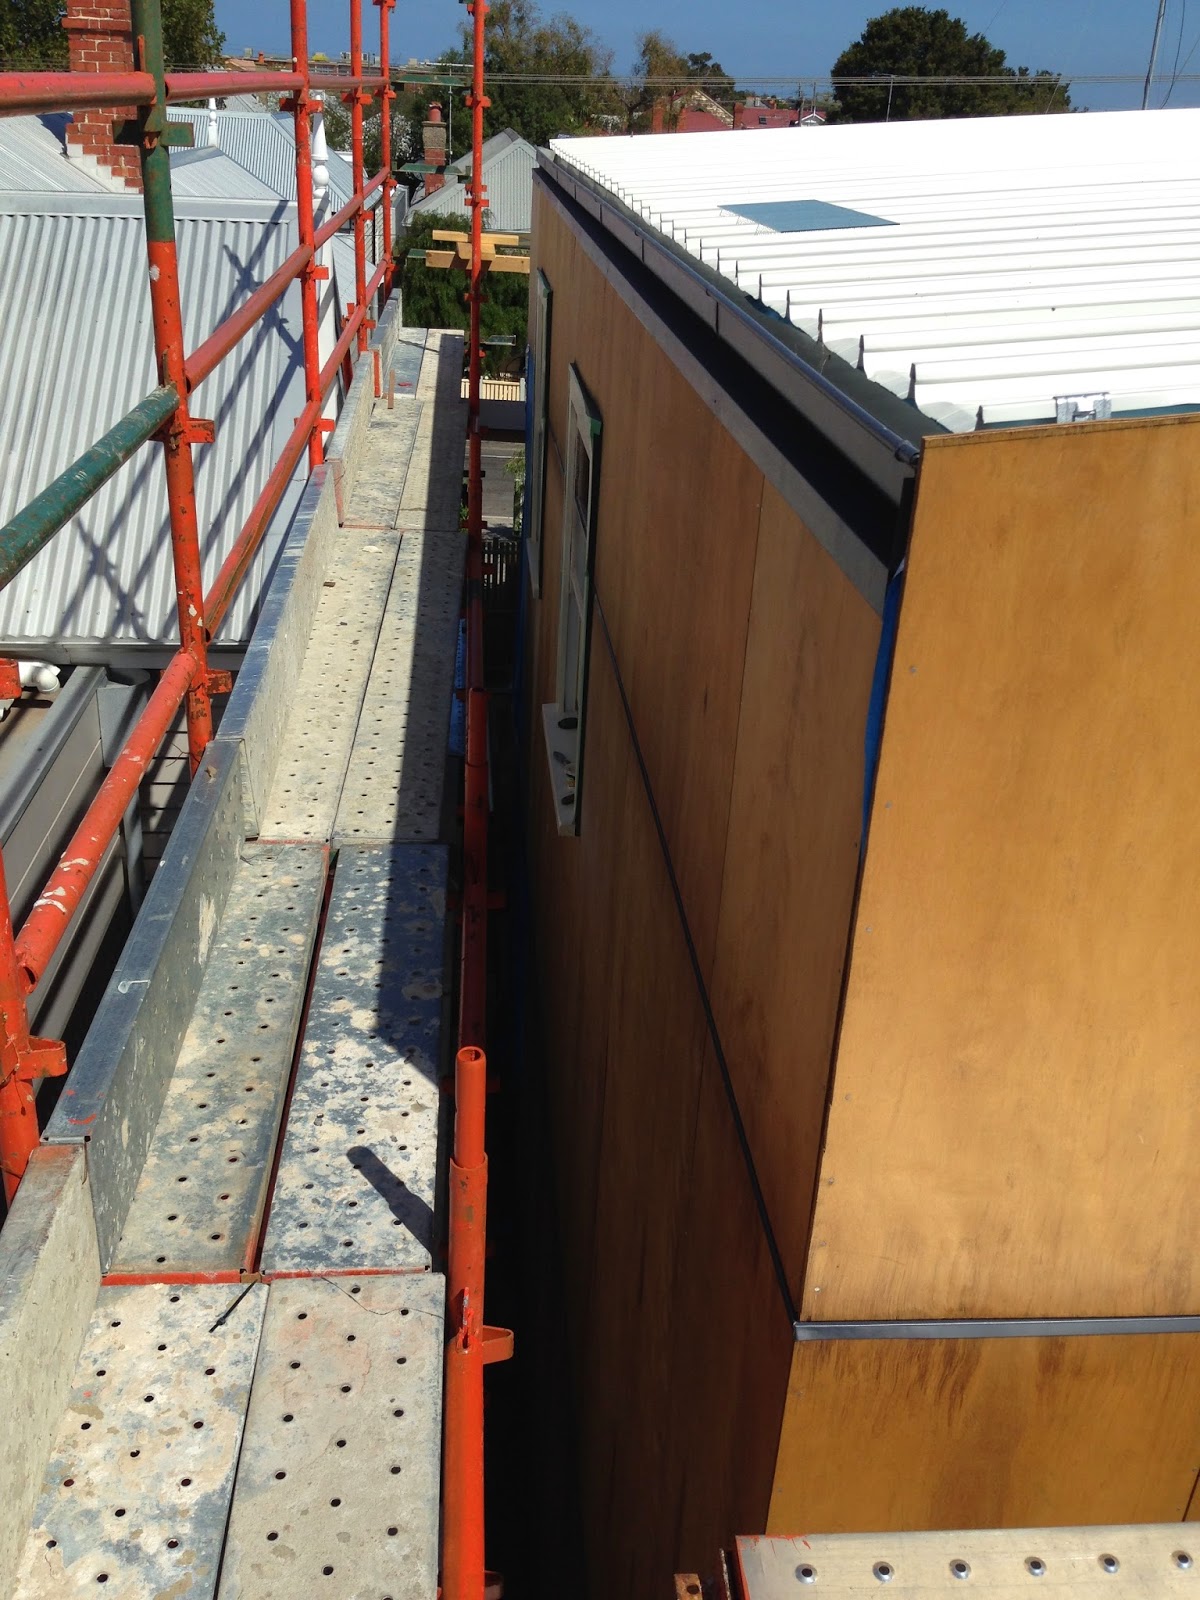
However we created a lot of work in terms of sanding, puttying, and glazing, much of which was covered in the last chapter.  But now they are in, and Jess has finished cutting her plywood around the windows, they look sharp.

As I write this, rain is lashing the sides of the house, and Right Now is a good moment to be sure the metal flashings around the windows are watertight.

Theoretically we've designed it so that water is directed around the frame to the sill and then should drip off the corners.  Already I can see that I should have designed in a flashing to the junction of the bottom sill and the ply underneath it.  While we are currently managing with a silicone seal, I suspect we will need to add in another flashings to protect the upper edge of the ply under the window.

I'll update this page when I have been to site after the rain over the Easter weekend...!


post and beam connections chapter 2

I know what you are thinking, what ever happened to that terrific sketch Michael made? The one with the post and the beam and the bits of steel?

Et voila.

This is Dean.  Like a lot of professional builders, he starts building his house at the top and works his way down.

For this tricky bit, he had to support the verandah with his head until Jess had finished preparing the post.  Due to a frightful domestic dispute over a table saw, a drill bit and a chemical anchor, she decided to take her time.

This is Dean on Day Two.


When it was all over, it looked like this.  For any architects out there, some of you are thinking, "Mmmmm sexy."  The rest of you are wondering what all the fuss is about.  Well for me it's about a kind of fabricated honesty.  We know that we need big bits of timber to hold up the verandah, and we know that they are held together with a truckload of fixings, so sometimes it feels more honest to express the grain of the timber and the strength of the fixings by making them visible.  But it is a fabricated honesty, because we want the bolts and the plates which hold it all together to be deliberate and beautiful.  They look lean and ordered, even if the job they do is over-designed and inefficient.


 Jess and Dean then moved inside.  The kitchen post went in amid much measurement, re-measurement, checking, re-checking, drilling, re-drilling, and a fair bit of discussion.  We are very happy, and looking at a fine chunk of timber, and a sweet piece of steel.


Thursday 10 April 2014

a tale of two gutters

Occasionally my adoring fans approach me in the street and say "Michael, can you help me?"  Usually I can send them away with helpful notes on how to turn an old cardigan into a lovely espaliered rose bush, but every now and then a request comes in which I need to answer in full. Like the tale of S, who yearns to understand what gutters we have chosen and why.
The roof deck framing.  The box gutter is the dark strip
between two of the joists

Well S, the two basic gutter types are an exposed eaves gutter, and a concealed box gutter. The eaves gutter is simpler, and leads the rain water along an external edge of the building. If the gutter blocks up, then water simply overflows the gutter into the ground. Builders and home owners love it.  Easy to maintain, cheap to replace.

The box gutter on the other hand is used when the gutter can't be exposed. Particularly when you have a wall which continues up past the roof as a parapet, it's difficult to run a gutter outside the building.  So the water is directed inside the building, not outside.  Difficult to build, tricky to see if there is a blockage, and a pain to maintain.  But visually clean.  Architects love them.

The eaves gutter, recessed into the facade.
For the deck we had to use a box gutter, and water will be directed back into the house and then to the rain water tanks. Something will go wrong and one day we'll have an explosion of water inside the house when the system gets blocked.  But in the meantime?  Visually. Clean. Designed. Sexy.

For the remainder of the roofs we have bowed to the financial pressure and used eaves gutters. We spent countless hours trying to work out a way to make them all recessed, concealed, or invisible. This was achieved only on the main building gutter, where we have recessed it into the line of the facade, but still outside the waterproofing line.

For me , this is the ultimate solution. The simplicity of maintenance, coupled with the simplicity of visual line.


Tuesday 8 April 2014

altona public toilets

 I agree.  Why should automatic public toilets be stainless steel?  Yeah! Why should they!

What do we want?

Human toilets!

When do we want them?

Now!

Well, they already have them in Altona on Millers Road next to the wetland, so sit down and stop complaining. 

Colorbond metal sheet cladding, covered in stained timber strips.  Still a bundle of classical modernist detailing pretending to be a restrained timber box, but very impressive all the same.  except that stray poly pipe sticking out at one corner. Maybe that makes it more human.  :)

Even better, the guy in the top picture was shouting at the door to open.  It seems the computer controlling the door didn't want him inside....

very very small built thing

Help me out here.  We were wandering down the Altona dog beach trying to retrieve a tennis ball from our dog (isn't it supposed to be the other way?) when we came upon these beautiful air shafts in the sand, presumably a collection of small shell shards and sand glued with a mucous.  After checking online the best I could find is that they are either sandworms or sand worms (Galeolaria) or alien landing sites.  Given that they are quite small, the first option seems unlikely.

If anyone has more information, I'd love to hear from you.

Sunday 6 April 2014

cladding chapter 2

Ta da!!!

The protective outer layer of scaffolding has finally been peeled back to reveal the cladding in all it's raw glory. 

 That's Dean on the left standing dangerously high and unsupported on a ladder.  Below the ground floor eaves are two sheets which are yet to be coated.

Over the past few weeks Jess and Dean have meticulously measured, cut, clouted and argued over the ply cladding sheets, and equally as lovingly placed the capping strips on.  All the edges of the ply are either covered and or coated, and everything has been given a coating of the Deck-Doc, and a rub down with an oily cloth. Shiny.  We are really pleased to see the results, and really please to have reached another stage in the works.


The shot to the left shows the East facade, and two upper window to the bathroom and a bedroom.

I love the deck-Doc, but I am covered in oil after a coating session.  It just seems to get everywhere, and the smell of the oil and feel of the lanolin remains with me long after.  It has a viscosity which seems to allow it to seep in well to the grain of the timber, but allows it to spread fast across my hands, face and clothing


Horizontal metal flashings finished in Colorbond "Ironstone" take water away from the upper sheet edges, and the vertical tallowwood 18x35 strips protect the vertical edges.